Your Cart is Empty
~ Waiting List in Operation ~ Please Ask Before Ordering ~
~ Personalised jewellery to treasure forever ~
~ Waiting List in Operation ~ Please Ask Before Ordering ~
~ Personalised jewellery to treasure forever ~

How to Make Your Own Baby Hand and Foot Casts at Home
September 05, 2018 7 min read
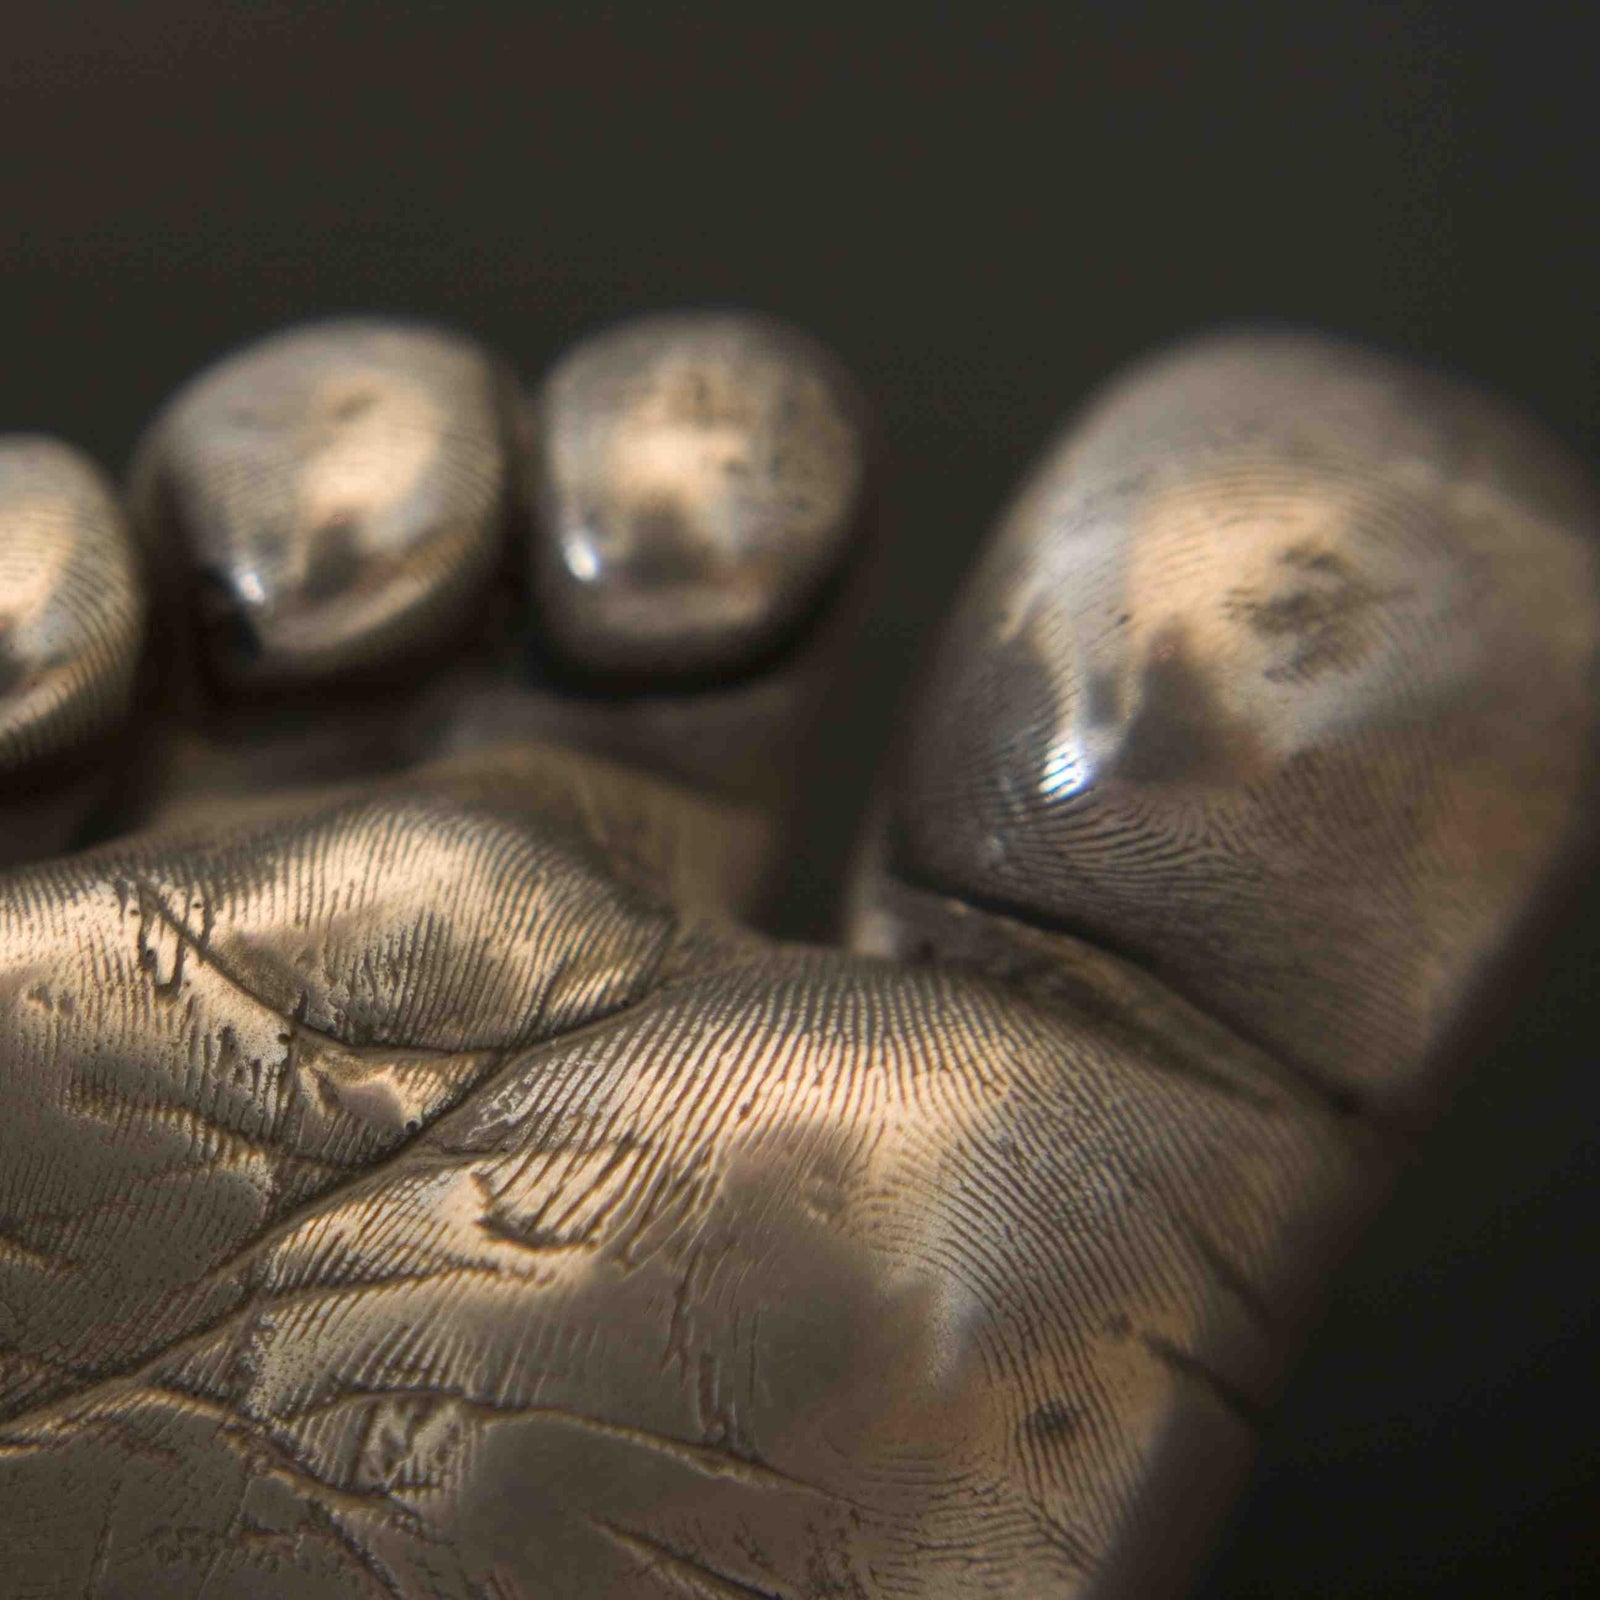
So this is where it all began. I’ve been casting children’s hands and feet for well over 10 years now and in that time, I have made sculptures for hundreds of families, my speciality being baby hand and feet cast in solid bronze and gorgeous hallmarked sterling silver.
In that time, I have seen A LOT of absolute disasters where customers attempted to make their own casts using terrible kits, ingredients and instructions.
Today, I’ll show you exactly how to make the perfect hand or foot cast for absolutely anyone, a baby, a child, or even an adult.
They make stunning keepsakes for yourself, or a gift for a special someone.
I’ve made these for each of my children. Perfectly preserved moments in time. It’s almost unbelievable that my beautiful little people were once so tiny!
Your sculpture will be made from acrylic plaster, as it’s never a good idea to encourage people to play with molten wax or hazardous chemicals (sorry folks), but unlike plaster which disintegrates over time, it will still last a lifetime (as long as you don’t drop it / throw it, or such like).
To make your hand or foot mould, you will need:
2 Adults
Although possible to cast a baby or child with only one person doing everything, it’s definitely not going to be easy.
I would always recommend having one person sat ready with the baby or child to be cast, whilst a second person mixes the alginate gel and holds the mould while it sets.
Skin Safe Alginate
You can purchase alginate from a lot of places, but I would highly recommend the Normal Set Alginate from Alex Tiranti. It’s not the cheapest, but it’s the industry standard for body casting and life cast sculptures.
One 500g bag should easily cast 2 hands, 2 feet, or one hand & one foot for most children up to one year.
It’s a good idea to buy more than one bag. If your child moves and spoils the mould, you might need more.
Why? Alginates are not all created equal. Trust me. I’ve tried them all.
Cheap dental alginates or colour change (chromatic) ones may seem tempting, but it’s almost impossible to get rid of the lumps when mixed with water. They produce a VERY runny mixture with a ridiculous number of air bubbles and can have unpredictable setting times. This definitely doesn’t help when you’re trying to keep your wiggly baby perfectly still.
These air bubbles will appear all over your finished sculpture as lumps of plaster. They are hideous to remove and will damage the surface and detail of your finished cast.
Honestly – It’s just not worth it.
2 identical pots or containers that will comfortably fit the hand or foot
It can be helpful if these are see through, but this is not strictly necessary.
The most important thing, is to make sure that they are the same size and shape and that the hand or foot cannot touch the bottom or the sides of the container.
If you do not have containers of a suitable shape and size, you can easily make them out of a piece of card.
2 jugs or suitable mixing containers (2 litre ones are usually a good size for babies and young children).
An electric hand-blender (Stick-style blender).
Once the NORMAL SET alginate powder is combined with water, you have a maximum of 2 minutes working time.
As you will be mixing a large amount of alginate, attempting to mix by hand will just leave you with a lumpy mix that will probably set before you ever get the hand or foot into it.
Hand blenders are great at mixing alginate to a perfect, creamy custard consistency.
The only downside is that the blue alginate colour can slightly stain the end of your blender, especially if you are using a white plastic one.
A digital kitchen timer that counts in minutes and seconds.
Things that are nice, but not 100% necessary
An apron or old clothes for the person mixing the alginate.
Unless you are very careful, hand and foot casting is a VERY messy business.
You can easily find yourself covered in liquid alginate – which can stain a lovely light blue colour and no, it doesn’t come out in the wash. If you value your clothes – wear an apron.
An apron, old clothes or an old towel for the person holding the child and the child themselves.
Casting in just a nappy can be helpful, as long as it does not upset the child.
Floor or surface covers.
If you have floors or surfaces that need protecting, this might be a good idea.
A torch and small mirror.
To look inside your mould when made. This will allow you to check to see if your baby has moved and spoiled the mould.
Casting a Hand or Foot in Alginate Gel
The best time to cast a baby or small child is when they are sleeping or distracted by a feed.
Relaxed, sleepy little ones are much easier to cast.
If they wiggle their hand or foot during the minute when the gel is setting, they WILL spoil the mould.
- Before you start, it’s always a good idea to perform a quick allergy test.
I have never known anyone to have an allergic reaction to alginate, not even the tiniest premature baby,but there’s always exceptions, so it’s best to be safe than sorry, (Alginate Safety Data).
Simply take a small pinch of alginate gel and mix with a drop of water in the palm of your hand to make a weak mix.
Apply this tiny amount to one spot on the back of the child’s hand or foot and leave for 5 minutes.
Never proceed with a casting if a reaction occurs.
Prepare your workspace.
Make sure all surfaces and clothes are covered – including the child being cast.
Lay out all of your tools and ingredients within easy reach and make sure they are completely ready – Check your hand blender is plugged in!
- Measure out your water and alginate powder.
Fill one of your identical containers, to ¾ full with blue alginate powder.
Fill the second identical container completely with water.
It is VERY IMPORTANT that the water is luke warm / blood temperature.
If the water is cold, the alginate mould will take a long time to set and will upset the child being cast.
If it is too warm, the alginate will set too fast and you will not have enough working time.
- One person should be sat ready with the child to be cast.
Decide on the hand or foot you want to cast and make sure the child is in a good position for that hand or foot to be placed into the container of alginate gel.
You can test this out using an empty container.
This person is responsible for holding the child at all times during the casting.
Now for the fun bit.
Alginate sets very fast. You only have 2 minutes overall working time before it starts to set, so you need to get everything mixed and the child’s hand or foot into the gel pretty quickly.
Timing here is crucial.
- Set your digital kitchen timer to 2 minutes (120 seconds).
Pour your water into your mixing jug first (never the other way around).
Add the alginate powder as quickly as you can and immediately start your kitchen timer.
You have exactly 1 minute (60 seconds) to mix the alginate gel using your hand blender.
Mix as quickly and firmly as possible, making sure you have mixed the powder from around the bottom and edges of the container and removed any lumps.
Do not attempt to mix for longer than the 60 seconds, even if a few lumps still remain, or you will not have enough time to position the child’s hand or foot before the gel sets.
The gel should look like thick, creamy blue custard.
- Place the child’s hand or foot straight into the alginate gel, holding firmly, but gently around the ankle or wrist.
It is important to make sure that the hand or foot does not touch the bottom or sides of the container, as you will see this in the finished sculpture.
During the remaining minute (60 seconds), the hand or foot has to remain completely still, or they the gel will turn to mush, instead of giving a perfect cast.
Once the 2 minutes is over, the alginate gel should have set and be firm to touch.
To double check, press the surface gently.
You shouldn’t need to, but if you feel it is necessary, hold the child’s hand or foot in position a little longer.
Although 60 seconds does not sound like a long time, it will seem like forever if you are trying to stop a child from wiggling their fingers or toes.
- Press the surface of the alginate gently around the wrist or the ankle, to break the seal.
Slowly and gently remove the hand or foot from the mould.
The hand or foot should come out of the mould clean, with no alginate residue.
It can get a little stuck under nails, but this can be easily wiped clean with a warm cloth or wet wipe.
If the hand or foot is covered in bits of alginate gel mush, the child has moved during the 60 second setting stage. This can spoil the mould.
- You can now (if you like), check the inside of your mould with your torch and small mirror.
The inside of the mould should look smooth without any bits missing. If you look carefully, you should be able to count 5 fingers or 5 toes and see if the hand or foot has touched the sides of the container.
At this point, you can decide whether you want to go ahead and make a sculpture from your mould, or whether the little ones has moved too much to get a good cast.
If you are not happy with the mould, then start again.
Leave a comment
Comments will be approved before showing up.
Subscribe
Sign up to get the latest on sales, new releases and more …
Join the Club
WE'RE SO PLEASED TO SEE YOU!
Stay a while and look around.
While you're here, why not subscribe to our newsletter?We'll give you £20 off your first order, VIP access to new products, and access to our very special sample sales.We promise not to annoy you (honest).